Watercolor Flower Painting: Step-by-Step Tutorial


What You'll Need
- Paper
- Brushes
- Paint colors
- Palette
- Water cup
- Pencil
Color Palette
If you have ever tried to paint a flower and ended up with a stiff, anatomical diagram, this is the reset button you need.
Today, we are doing a loose sketchbook study. We aren't painting "perfect" specimens; we are capturing a quick, breezy bouquet using simple dabs and wet edges. This watercolor flower painting technique is about capturing the gesture of the plant, the way it leans and clumps together, rather than the exact number of petals.
The Supplies (Keep it Simple)
- Paper: 140lb/300gsm Cold Press paper. (You need the texture to grab the pigment).
- Brush: A Size 6 or 8 Round Brush (one brush can do it all).
- Paints: See our "Meadow" palette below.
The Color Palette
Based on the sketchbook study above, we are using a vintage, muted palette that feels soft and organic.
- Indigo (or a Muted Blue): For the primary blue blooms.
- Yellow Ochre: For the soft, warm yellow flowers (not neon lemon!).
- Sap Green: For the leaves.
- Burnt Umber/Sepia: For the dark, contrasting centers.
Step-by-Step: Your Expressive Watercolor Flower Painting
The secret to this bouquet is grouping. We aren't painting floating flowers; we are clustering them so they look like they are hugging. If you space them out too much, you end up with a pattern of lonely polka dots rather than a lush, gathered arrangement. Don't be afraid to let the wet edges touch! That magical bleed where the blue meets the yellow is what creates the shadows and depth for you. If you are struggling to find colors that blend this beautifully together, you can check out our watercolor kits for a curated palette that takes the guesswork out of mixing.

The Yellow Anchors
- Load your brush with watery Yellow Ochre.
- Paint two loose, 5-petal shapes. Don't close the circles perfectly, leave little gaps between the petals.
- Visual Check: Place one slightly lower than the other. They shouldn't be perfect twins.

The Blue Companions
- Rinse your brush and switch to Indigo (diluted for a soft blue).
- Paint three blue flowers around the yellow ones.
- The "Kiss": Let the wet blue petals lightly touch the yellow ones in a spot or two. The colors will bleed slightly, creating a beautiful green connection that makes the bouquet feel unified.

The Leafy Tuck-In & The Dark Centers (The "Pop")
- Mix a tea-consistency wash of Sap Green.
- Tuck leaves into the empty white spaces between the flowers.
- Paint some leaves pointing up and some pointing down.
- Artist Tip: Don't draw a stem and then stick a leaf on it. Just press your brush down to make the leaf shape right next to the flower head.
- Wait for the petals to be semi-dry (damp, but not puddly).
- Load the very tip of your brush with thick Indigo or Sepia.
- Dot the centers of the flowers.
- The Magic: Because the paper is slightly damp, the dots will fuzzy out just a little bit, looking like soft pollen rather than hard polka dots.
Common Mistakes (and Fixes That Work)
Every beginner hits these. The good news: most fixes are simple, and none require a dramatic identity crisis.
Muddy colors
- Cause: overmixing on the paper, layering before it’s dry, or mixing complements accidentally.
- Fix: rinse your brush more often, use “tea” first layers, and let layers turn matte before adding details.
Paper buckling
- Cause: too much water, paper too thin.
- Fix: use watercolor paper, tape edges down, and avoid soaking the page for small flowers.
Flat flowers (no depth)
- Cause: one-value petals with no shadow placement.
- Fix: add a second “milk” layer at petal bases after the first layer is dry, plus a few “cream” accents.
Blooms or cauliflower edges
- Cause: adding wet paint into a surface that’s drying (the awkward in-between stage).
- Fix: either paint while it’s clearly shiny, or wait until it’s fully matte. Commit to one.
Harsh edges
- Cause: paint too dry, or you waited too long to soften.
- Fix: clean, damp brush to gently feather the edge, then blot.
Frequently Asked Questions
How do I keep my watercolor flower painting from looking like a blob?
White space! The most important thing in flower.png is the tiny slivers of white paper left between the petals and between the flowers. If you paint everything solid, you lose the definition.
My colors are bleeding too much.
You are working too wet. If the yellow and blue turn into a giant green puddle, blot your brush on a paper towel before you touch the paper. You want "damp," not "dripping."
Can I use bright colors instead?
Yes, but the "vintage" look comes from using muted tones (Ochre instead of Lemon Yellow, Indigo instead of Cyan). If you use bright colors, the painting will look more like a cartoon and less like a sketchbook study.
Do I need to sketch with a pencil first?
For this style?
No. Pencil lines often confine you. Trust your brush to make the petal shapes. If you are nervous, just put a tiny dot where you want the center of each flower to be as a guide.
Conclusion
Mastering watercolor flower painting is less about talent and more about control: paper that can handle water, a few reliable strokes, and timing your layers. Start with the warm-up drills, paint the four core flowers, then use the quick “flower recipes” to build your own page of flower watercolor paintings without overthinking every petal.
When you’re ready for more guided practice (and fewer guessy moments), head to Tobio’s watercolor tutorials and pick a project you can finish in one relaxing session.
Mel, FounderLike these guides? Set Tobio's as a preferred source on Google and our pages will show up first when you search for watercolor questions.
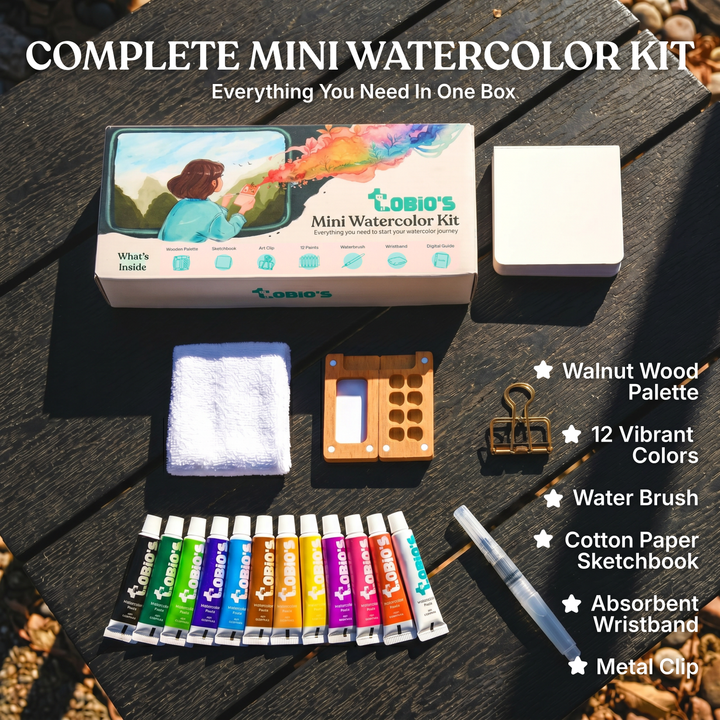
Ready to paint along?
Everything you need to paint anywhere and feel inspired doing it.
- Ultra compact
- Express yourself creatively
- For total beginners