Grand Canyon Watercolor Painting: Step-by-Step Tutorial


What You'll Need
- Watercolor Paper
- Pencil and eraser
- Two water cups
- Watercolors
- Round brush
Color Palette
If you’ve ever stared at a magnificent desert landscape and thought, “Beautiful… but how do I paint that without it turning into a muddy brown puddle?”, grab your sketchbook. You're in the right place.
While this is technically a tutorial for a grand canyon watercolor painting, we are tossing the rigid rules out the window today. We are focusing entirely on a "Loose Sketchbook Style." It’s fast, highly expressive, completely beginner-friendly, and requires exactly zero rolls of masking tape or professional tracing. Just you, a travel palette, and a bold approach to color.
If you want more projects like this after you finish, you can browse our full library of step-by-step lessons on Watercolor Tutorials.
The Minimalist Setup & Color Palette
You do not need a studio full of fancy gear for this. A small sketchbook with decent paper, 140lb/300gsm cold press is the sweet spot so your water doesn't warp the page into a taco, is all you really need.
Notice the bright, beautiful paint blobs in the wooden palette at the top of the image? We are actually going to ignore those completely! Based entirely on the painted pile of stones on the page, here are the 4 earthy pigments you need to create this exact look:
- Yellow Ochre: A pale, dusty yellow-tan for the sunlit tops of the stones.
- Raw Sienna: A warm, mid-tone brown for the earthy sides and transitions.
- Payne's Gray: A cool, moody slate gray for the cooler rocks and soft shadows.
- Burnt Umber: A deep, rich brown for the darkest, crunchiest crevices.

The Bare-Bones Sketch
Keep your pencil drawing incredibly light and simple. We’re blocking in bold shapes, not carving marble. Draw a quick horizon line for the sky at about the top third of the page. Then, add a few jagged, stepping lines for the distant and mid-ground layers, and block in a chunky foreground cliff.
Leave a winding path at the bottom for the river.
No need for a taped border, let the edges be organic!

Sky and River Washes
Wet the sky area slightly with clean water and drop in your Cerulean Blue, pulling it downward so it fades near the horizon. While you've got that beautiful blue loaded on your brush, swoop a single, confident stroke through the bottom of your sketch to establish the Colorado River. Let this dry completely (feel free to wildly fan your sketchbook to speed this up).

Distant Haze
Mix a very watery, pale violet-gray using your Cerulean Blue and a whisper of Alizarin Crimson. Paint the silhouette of the distant cliffs. Leave a few tiny, unpainted white gaps between your shapes to suggest light bouncing off the rocks. It’s a cheap trick, but it works every time!

Foreground Fire & Crunch
Time for the drama. Load up on your Yellow Ochre and Burnt Sienna. Paint the mid and foreground cliffs boldly, letting the yellow and sienna bleed into each other right on the paper. To create those deep, satisfying cracks and shadows on the closest rocks, mix your Burnt Sienna with a little Cerulean Blue to make a dark, punchy neutral. Drop this shadow mix under the ledges while the paper is still slightly damp.
The "Walk Away"
Now comes the hardest part: resist the urge to fiddle.
You'll want to smooth out a bloom or "fix" a messy puddle, but don't.
The true charm of an expressive watercolor painting of rocks lies in those unpredictable watermarks and natural bleeds.
Drop your brush, step back, and let it dry completely.
Style Variations: Moody Sunrise, Sunlit Plateau, and Storybook Canyon
Want to change the vibe of your grand canyon watercolor painting?
Try these quick sketchbook adaptations:
The "Moody Sunrise" (Dramatic & Heavy)
- Cool the palette: Swap your bright Yellow Ochre for deep, moody blues like Indigo, or mix extra Alizarin Crimson into your browns to create rich, dark purples.
- Deepen the shadows: Paint the deep canyon crevices much darker, leaving only a tiny sliver of pale rim light catching the very top of the highest cliffs.
- Lost edges: Let the bottom of the lowest rock bands bleed entirely into a dark, heavy wash to anchor them in the cold morning shadows.
The "Sunlit Plateau" (The Smooth, Gentle Phase)
- Lighten the palette: Stick to highly watered-down Yellow Ochre and the absolute palest wash of Burnt Sienna.
- Change the proportions: Soften the jagged edges so the distant mesas sit as flat, hazy, atmospheric bands fading into the horizon.
- The "Fresh" Texture: Skip the heavy, crunchy foreground shadows. Keep the washes light and smooth for a hazy, high-noon desert look.
The "Storybook Canyon" (Simplified for Cards & Patterns)
- Exaggerate shapes: Push the shape language into perfectly stacked, geometric blocks or distinct, stylized stair-step cliffs.
- Bring back the speckles: Lean into the illustrative vibe by flicking a few perfect, deliberate splatters of paint (try Burnt Sienna) over the dry cliffs for a stylized, dusty texture.
- Flat color: Skip the messy watermarks. Use flat, highly-pigmented, graphic washes of solid color to separate the distinct layers of the canyon.
Inspiration: Why This Style Works
This loose, expressive sketchbook approach to a grand canyon watercolor painting is perfect for:
- Travel Journals and Southwest Road Trips:
Capture the sweeping geological formations you spotted from the South Rim without needing a panoramic lens or a geology degree. You don’t need to paint every single mineral fracture and rock strata; you just need that chunky, earthy silhouette and bold color to bring the memory back to life. - Earthy & Desert Decor:
Because desert landscapes are naturally grounding and warm, a soft, loose study looks timeless in a home office or a cozy reading nook. Frame a trio of these quick studies (perhaps pairing them with a sprig of dried sage or a pressed desert wildflower) for instant, nature-inspired wall art that doesn't feel rigid or "store-bought."
Frequently Asked Questions
What if my canyon looks too messy?
Step back! This is a 15-minute sketchbook study, not a geological survey. Embrace those unpredictable water bleeds and loose edges, they're exactly what give your painting its expressive, organic charm.
Can I still paint this without the exact colors?
Absolutely. You can tackle a grand canyon watercolor painting with almost any basic travel palette. As long as you have a blue, an earthy yellow, and a reddish-brown, you’re good to go. Focus on your light and dark values, not the names on the tubes!
Why are my rock shadows turning to mud?
Mud happens when you overwork wet paper. To keep your shadows crisp and punchy, remember Step 5: The Walk Away. Let your initial warm washes dry completely before adding in your dark details.
Conclusion
This grand canyon watercolor painting tutorial is built for real life: limited time, limited supplies, and a strong desire to avoid muddy chaos. Keep your shapes simple, separate your values, and let the distant layers stay light and cool while the foreground gets warm and bold.
If you want another guided project ready to go, head to the watercolor tutorials page, or check out Tobio’s Kits for more paint-at-home kits that make creativity feel doable on a weeknight.
Mel, FounderLike these guides? Set Tobio's as a preferred source on Google and our pages will show up first when you search for watercolor questions.
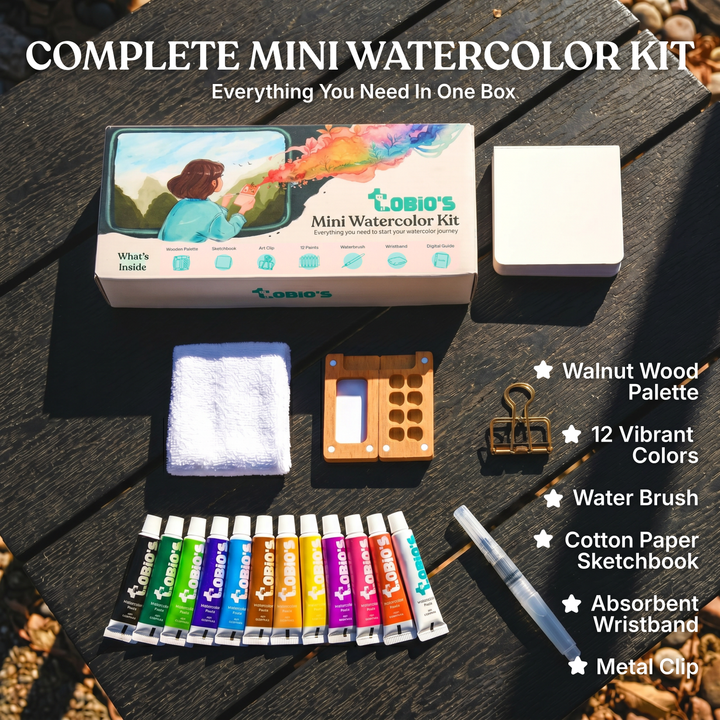
Ready to paint along?
Everything you need to paint anywhere and feel inspired doing it.
- Ultra compact
- Express yourself creatively
- For total beginners