


Owl Watercolor Painting: Step-by-Step Tutorial


What You'll Need
- Watercolor paper
- Watercolor paints
- Brushes
- Pencil + eraser
- Water jar
- Paper towel
Color Palette
Forget the soggy brown potato with eyes. If you’ve ever wanted to capture the quiet charm of an owl without spiraling into a 40-step technical manual, this is your sign to grab your brushes.
Welcome to the 15-Minute Expressive Sketchbook Study. In this tutorial, we aren't aiming for biological perfection or complex layering. Instead, we are focusing on a loose sketchbook style that is fast, fun, and incredibly beginner-friendly.
Based strictly on the cheerful, character-filled study in image_26.png, you’ll learn the basics of how to paint an owl in watercolor using simple, defined shapes and clean, contained washes. It’s about capturing a mood, not every single barb on a feather.
The Sketchbook Color Palette
To replicate the warm, approachable feel of image_26.png, we need just four specific pigments. Keep it simple to avoid muddy colors.
- Raw Sienna (or Yellow Ochre): For that luminous, warm glow on the chest and face edges.
- Burnt Sienna: The core color for the wings and head.
- Burnt Umber (or a darker brown): For those distinct, slightly irregular dark feather marks.
- Payne's Gray (or deep black): Essential for bringing the eyes and beak to life.
Supplies for Quick Success:
- Paper: 140 lb (300 gsm) cold press watercolor paper. (A small sketchbook page is perfect).
- Brushes
- Basics: Pencil, eraser, water jar, paper towel, and a white plate for mixing.
Step-by-Step Owl Watercolor Painting
If you want a charming creature, not a soggy potato, this owl watercolor painting study is perfect for you. We focus on a loose sketchbook style – soft washes, spontaneous blends, and character over rigid perfection. In just fifteen minutes, you’ll master layering simple shapes and contained washes using a sophisticated limited palette to build dimension effortlessly. This low-stress project is designed for everyone, no perfect drawing skills required. There's no complex layering or professional tracing here; you will bring your friendly creature to life with simple, rewarding techniques. Are you ready to pick up your brush and begin this creative win? For curated supplies and guided kits to simplify your creative journey, explore the options at Tobio's Kits before you begin.

The Character Sketch
- Forget anatomical diagrams. This sketch is about shape-stacking. Lightly gesture a large egg shape for the body. Place a soft, rounded bell shape on top for the head.
- Within the head, draw that distinctive, simple heart shape that defines the barn owl’s face. Mark two circular eyes and a small, small upside-down triangle beak right in the center. Add parentheses curves for the wings down the sides. Keep these lines faint—in this style, the graphite should almost disappear under the paint.

The Warm Underwash
- Looking at image, the light is warm and soft. We will start by laying down the lightest values on dry paper.
- Mix a very watery "tea" consistency of Raw Sienna (or Yellow Ochre). Paint the heart-shaped face, but do not paint the eyes or beak yet. While it is still wet, wash that same warm yellow down the chest area, leaving a few patches of white paper showing through for automatic highlights. Let this dry fully.

Head and Wings Base
- Next, we build form. On dry paper, mix a "milk" consistency of Burnt Sienna.
- With a medium round brush, wash this warm brown over the head (around the facial heart shape) and down the two wings. Notice in the reference image that the application is clean and contained within the shape outlines. We aren't doing big, wet-on-wet bleeding here; we are defining distinct blocks of color. This contained approach is forgiving and fast.

Eye Character and Expressive Detail
Wait for your paper to dry bone-dry. This is the step where most beginner owl watercolor paintings go sideways, so take a deep breath before you paint the eyes.
Switch to your small round brush.
- Eyes: Load your brush with a dense, ink-like consistency of Payne's Gray (or black). Carefully paint the circular eyes, but leave a tiny circle of dry, white paper in each one for that life-giving sparkle. That highlight is what separates a charming character from a cartoon zombie. Define the edges of the face heart-shape with a faint line of this gray.
- Beak: Using a mid-gray mix, paint the small beak triangle.
- Feather Marks: Mix a darker brown using Burnt Umber. With a quick, confident, "artist-to-artist" touch, add slightly messy, irregular "U" marks down the chest and a few short, scattered strokes on the wings. Do not Individually name every feather; suggest them. Let them be a little uneven; that's the "expressive" part of the study!
Easy Backgrounds and Owl Variations
Once you’ve finished the main owl, you can leave it clean and minimal, or level up with a quick background. This is also how you can make your watercolor paintings of owls look more finished without adding tons of detail to feathers.
Fast background option: Night sky (about 10 minutes)
- Keep the owl dry
- Wet the background area around the owl with clean water
- Drop in dark blue, then deepen the top edge with a touch of black or a blue+brown dark mix
- Fade lighter as you move downward
Once dry, you can add stars with opaque white paint or a white pen if you have one.
Fast background option: Soft forest (about 10 minutes)
- Mix a very diluted green (yellow + blue, more water than you think)
- Paint vertical, blurry strokes behind the owl to suggest trees
- Touch in slightly darker green near the bottom while it’s still wet
Frequently Asked Questions
Is an owl watercolor painting suitable for a beginner with no art experience?
Yes, owl watercolor painting is one of the easiest beginner projects because it is built from simple shapes and forgiving, contained washes. If you can stack basic ovals and circles to create a character sketch, you can successfully finish this low-stress project in just 15 minutes. There is no complex layering or professional tracing required.
What are the best paint colors for a simple owl watercolor painting?
You only need four specific pigments to replicate the warm, sophisticated feel of this study. This expressive sketchbook study relies on Raw Sienna (or Yellow Ochre) for a luminous glow, Burnt Sienna for the core head and wings, Burnt Umber for distinct feather marks, and Payne’s Gray (or deep black) for the eyes and beak. We use specific paint names like Burnt Sienna to ensure topic authority.
How can I make my owl watercolor painting look dimensional, not flat?
To add instant dimension without overthinking your whole personality, prioritize one good shadow. Add a soft Raw Sienna glow to the chest and a gentle shadow under the head. Also, ensure you leave a clean highlight in each eye; that single sparkle sugerests moisture and life, making your friendly creature pop off the page.
Do I need an extensive supply list to paint a beginner watercolor owl?
No, you only need a small sketchbook page and a few basics for this 15-minute expressive study. Grab 140lb (300gsm) cold press watercolor paper, a medium round brush (size 6 to 8) and small round brush (size 2 to 4), along with pencil, eraser, water jar, paper towel, and a white plate for mixing. Keep it simple for quick success.
How do I prevent my owl watercolor portrait from becoming a "soggy brown potato with eyes"?
The key is patience for drying time between layers. Watercolor rewards patience and punishes poking, so let layers dry fully before adding the next pass, especially for high-impact areas like the eyes. Prioritize contained washes and only add a few Confident, irregular feather marks – suggest feathers, do not individually name them.
Conclusion
An owl watercolor painting is the perfect “I want to paint, but I don’t want to overthink my whole personality” project. Use simple shapes, start with light washes, build midtones, then add bold details last. If you only do one upgrade, add a soft shadow under the head and leave a clean highlight in each eye.
Want more calming, beginner-friendly projects you can actually complete? Visit Tobio’s Kits and keep going with our watercolor tutorials.
Mel, Founder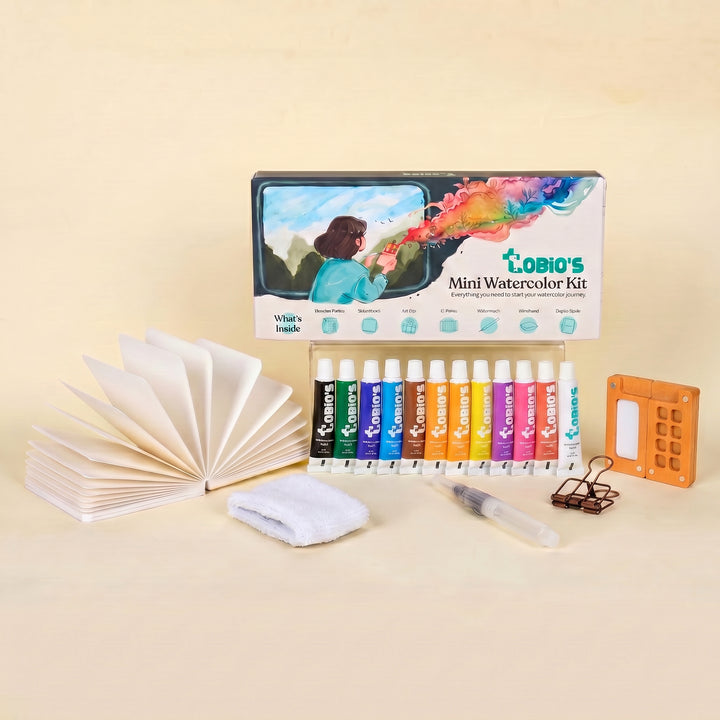
Ready to Paint?
This tutorial was designed for use with our Watercolor Kit.
Check it now


