How to Create a Dragon Watercolor Painting: Step-by-Step


What You'll Need
- Paper
- Brushes
- Paint colors
- Palette
- Water cup
- Pencil
Color Palette
Stop worrying about painting terrifying beasts with perfect anatomy. Today, we are channeling "Saturday Morning Cartoon" energy.
This is a loose, expressive sketchbook study designed to be fun, not fierce. We are creating a dragon watercolor painting that relies on wobbly lines and wet-on-wet washes to create a chubby, friendly character. No counting scales, no stress—just 15 minutes of playing with green paint to create a little guy who looks happy to be on your page.
The Supplies (No Fancy Gear Required)
You don’t need a studio full of equipment to make this little guy come to life.
- Paper: 140lb/300gsm Cold Press paper. (The texture is crucial here—it grabs the loose washes so you don't end up with a puddle).
- Brushes: Two rounds are all you need. A Size 6 to lay down the main green washes, and a Size 2 for the tiny spikes and facial features.
- Extras: A pencil (keep it light!), an eraser, and your water jar.
The Color Palette
We are using a fresh, "spring garden" palette to keep the dragon looking friendly rather than fierce.
- Sap Green: The perfect mid-tone green for the body. It’s natural, transparent, and easy to layer.
- Lemon Yellow: Use this for the belly and under the neck. When it touches the wet green, it creates a lovely lime glow.
- Alizarin Crimson: A deep cool red. We use this for the spikes to create a high-contrast pop against the green.
- Payne's Gray: Much softer than black, perfect for the eyes and nostrils without looking harsh.
Sketch a Friendly Dragon Template
We’re going for “charming dragon” not “anatomy exam.” Light pencil only. If you press hard, watercolor will highlight it like it’s gossip.
Step-by-Step: Your Expressive Dragon Watercolor Painting
We are painting this wet-on-dry for the most part to keep the shapes readable, but we’ll let the green and yellow blend naturally on the page.
The "Jellybean" Sketch
Don't overthink the anatomy.
- The Body: Draw a chubby jellybean shape standing up.
- The Head: Add a rounded rectangle on top.
- The Limbs: Sketch chunky little arms and legs. No muscles, just soft shapes.
- The Wings: Draw simple bat-wing shapes on the back.
- The Tail: A thick tail curving behind him.
Paint the branch (wet-on-dry)
On dry paper, paint the main branch with warm brown using your size 6 to 8 round.
- Press slightly for thicker areas, lift for tapered ends
- Add thin side twigs near blossom clusters
- While the branch is still damp, drop in dark bark mix along the underside for shadow
Dry time: 5 to 10 minutes, until it looks matte, not shiny.
First petal layer (light and airy)
Mix a generous puddle of soft base pink. Work one flower at a time so your paint stays controllable.
- Paint each petal in 1 to 2 strokes
- Leave tiny white slivers between some petals (it keeps the flower readable)
- While petals are damp, touch warm coral or deep rose near the center and let it bloom
Dry time: 10 to 15 minutes.
Add depth with glazing (don’t overdo it)
This is the difference between “cute” and “wow.” Make a medium pink (less water than your base).
- With a smaller brush (size 2 to 4), add a darker stroke at the base of each petal
- Rinse, blot, then soften the edge slightly with a clean damp brush
- Keep petal tips light for that Sakura glow
Dry time: about 10 minutes.
Centers and stamens (tiny details, big payoff)
- Mix diluted Yellow Ochre (lots of water)
- Paint a small center circle or oval
- While damp, touch a tiny bit of deep rose or brown on one side for a soft shadow
- After it dries, use a dark brown or grey for stamens: fine lines radiating outward, with tiny dots at some tips
If you’re enjoying this and want to turn it into a full “open the box and make something” kind of day, browse what’s available on Tobio’s Kits and pick a project that matches your current energy level.
Optional Backgrounds (Sky Wash or Bokeh)
A background is optional. White space is classy. But if you want dreamy, here are two easy wins.
Option A: Soft sky wash
- Mix a very pale blue (mostly water)
- Wet the paper around blossoms with clean water, avoiding petals
- Drop in pale blue near the top and let it fade down
Dry time: 15 to 20 minutes.
Option B: Bokeh circles (soft light spots)
- Start with the pale blue wash
- When it is damp, paint circles with a clean damp brush
- Blot each circle with tissue to lift pigment
Finishing Touches + Common Fixes
Finishing touches that make it look intentional
- Add a slightly darker line on one side of the branch for final contrast
- Deepen a few petal bases only, not all of them
- Optional splatter: use slightly stronger pink and protect blossoms with scrap paper
Common mistakes (and what to do instead of panicking)
- Blooms (cauliflowers): caused by adding wetter paint as an area dries. If still damp, soften with a clean damp brush and blot. If dry, glaze a light even wash to unify.
- Hard edges on petals: if damp, soften with clean water. If dry, gently lift with a damp brush and blot.
- Muddy color: stop. Let it dry completely. Then add one clean transparent glaze of soft pink.
- Overworking: if your paper starts feeling rough, it is begging you to stop. Let it dry and move on.
Want more floral practice like a full cherry blossom tree painting watercolor study? The simplest next step is painting a “canopy cloud” of light pink first, then adding a trunk and branches after it dries. You can find more step-based guidance on the watercolor tutorials page.
Conclusion
A good dragon watercolor painting is really just a simple sketch plus smart layering: a soft base wash, a couple glazes for form, then selective texture for scales and wings. Keep your palette limited, let layers dry, and don’t over-detail every inch of the dragon.
Mel, FounderLike these guides? Set Tobio's as a preferred source on Google and our pages will show up first when you search for watercolor questions.
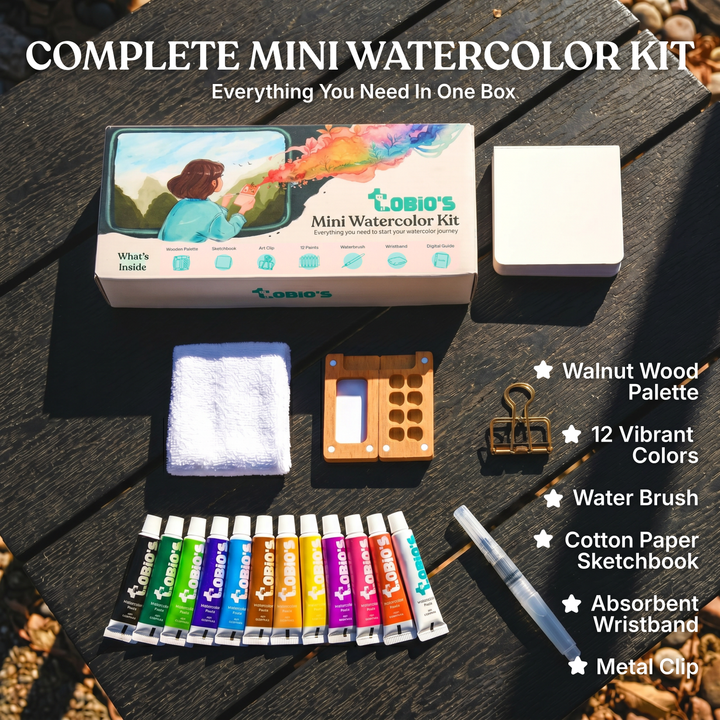
Ready to paint along?
Everything you need to paint anywhere and feel inspired doing it.
- Ultra compact
- Express yourself creatively
- For total beginners