


Jellyfish Watercolor Painting: Step-by-Step Tutorial


What You'll Need
- Watercolor Paper
- Pencil and eraser
- Two water cups
- Watercolors
- Round brush
Color Palette
Welcome to your new favorite warm-up! If you’ve ever tried making a jellyfish watercolor painting and ended up with a overworked muddy blob plus a few sad noodles, take a deep breath, you’re not alone.
Jellyfish look “simple” until you try to paint that floaty, translucent glow.
While this is a tutorial for a jellyfish watercolor painting, we are skipping the rigid rules and focusing purely on a Loose Sketchbook Style. It’s fast, highly expressive, and incredibly beginner-friendly. We are talking instant wins here: no masking tape, no professional tracing, and no agonizing over 45-minute drying times.
If you want more projects like this after you finish, you can browse our full library of step-by-step lessons on Watercolor Tutorials.
The Deep Sea Color Palette
To keep this loose and harmonious, we are limiting our palette. Based on the breezy, aquatic vibes of the sketchbook painting above, you only need three pigments. (Drop the mixing palettes, we want these colors to mingle directly on the paper!)
- Cerulean Blue: The star of the show for that bright, splashy, and slightly granulating ocean background.
- Ultramarine Blue: Used to deepen the shadows on the bell and add a punch of contrast to the tentacles.
- Cobalt Violet: For that ethereal, pinkish-purple glow in the jellyfish bell and its wispy appendages.

The Bare-Bones Sketch
Keep it incredibly simple. Draw a rounded dome (like an umbrella) with a slightly wavy bottom rim. Don't worry about drawing the tentacles, we’ll let the brush do that later. Keep your pencil marks faint so they don't lock into the paper once wet.

The Splashy Background Wash
Wet your medium brush and pick up a juicy amount of Cerulean Blue. Paint a loose, jagged square around your jellyfish sketch. Don't worry about straight edges; let the brushstrokes fade out into the white of the sketchbook page. Drop in a little Ultramarine Blue near the bottom corners for depth.
Leave the actual jellyfish bell completely dry and white for now.

The Glowing Bell
Once the background is mostly dry, wet the inside of the jellyfish bell with clean water. Tap in a bit of your Cobalt Violet near the top rim and let it bleed downward. Add a touch of Ultramarine Blue to the wavy bottom edge.
The secret here? Leave a few areas of pure white paper showing through to act as instant, brilliant highlights.

The Expressive Tentacles
Switch to your small round brush. Mix a watery puddle of Cobalt Violet and Ultramarine Blue. With quick, confident, and unapologetically wobbly strokes, pull lines downward from the bell. Let some tentacles trail off entirely, and group others together. If your hand shakes, congratulations, you just painted realistic ocean movement! Add a few tiny dots right under the bell for texture, and put the brush down before you overwork it.
Style Variations: Midnight Deep, Tropical Lagoon, and Storybook Bloom
Want to change the vibe of your jellyfish watercolor painting?
Try these quick adaptations:
The "Midnight Deep" (Dramatic & Heavy)
- Cool the palette: Swap the bright Cerulean Blue for a heavy dose of Ultramarine Blue or even a touch of Indigo mixed into your background wash.
- Deepen the shadows: Paint the underside of the jellyfish bell with a much darker, concentrated mix of Ultramarine Blue to create a sharp contrast against the glowing center.
- Lost edges: Let the longest tentacles bleed entirely into a dark, heavy background wash at the bottom of the page to anchor the jellyfish in the "crushing" depths of the ocean.
The "Tropical Lagoon" (Smooth & Gentle)
- Lighten the palette: Use a highly watered-down wash of Cerulean Blue for the background and keep it very airy.
- Change the proportions: Soften the jagged edges of the background wash so the water feels like a calm, sun-drenched pool.
- The "Fresh" Texture: Skip the heavy shadows under the bell. Keep your Cobalt Violet washes light and smooth for a fresh, translucent look that feels like a summer day at the reef.
The "Storybook Bloom" (Simplified & Stylized)
- Exaggerate shapes: Push the shape language into a perfectly rounded, umbrella-like dome or even a distinct, stylized heart-shape for a more whimsical feel.
- Bring back the speckles: Lean into the illustrative vibe by flicking a few perfect, deliberate splatters or dots of Cobalt Violet paint over the dry bell for a graphic, stylized texture.
- Flat color: Skip the messy watermarks and bleeds. Use flat, highly-pigmented, graphic washes of solid color within the bell to make it pop against the page.
Inspiration: Why This Style Works
This loose, expressive sketchbook approach to a jellyfish watercolor painting is perfect for:
- Aquarium Trips and Beach Days:
Capture the mesmerizing flow of the sea creatures you spotted at the local aquarium or on a morning beach walk without needing a high-speed camera or a marine biology degree. You don’t need to paint every single tentacle; you just need that floaty, ethereal silhouette to bring the memory back. - Coastal & Nursery Decor:
Because jellyfish are naturally calming and organic, a soft, loose study looks timeless in a bright nursery or a cozy coastal-themed room. Frame a set of these, perhaps adding a bit of white-space or a second study of a sea shell, for instant, nature-inspired wall art that feels personal rather than "store-bought".
Frequently Asked Questions
Which paper works best for this style?
Stick with 140lb (300gsm) cold press paper. It is sturdy enough to handle heavy, splashy background washes without buckling or warping.
How do I avoid muddy colors?
Limit yourself to the 3-color palette, Cobalt Violet, Cerulean Blue, and Ultramarine Blue. Most "mud" is caused by overworking the paper with too many layers or pigments.
Why should I leave white space in the bell?
Unpainted paper acts as an "instant highlight". It is the secret to making your jellyfish watercolor painting look translucent and light-filled rather than flat.
Conclusion
The secret to great jellyfish watercolor paintings is restraint: a light sketch, transparent washes, and tentacles that stay loose. Do the quick version once to get the feel, then try the full layered approach when you’re ready for extra glow and depth.
When you want your next project lined up and ready, head to our watercolor tutorials for more step-by-step lessons, and explore what’s new on Tobio’s Kits.
Mel, FounderLike these guides? Set Tobio's as a preferred source on Google and our pages will show up first when you search for watercolor questions.
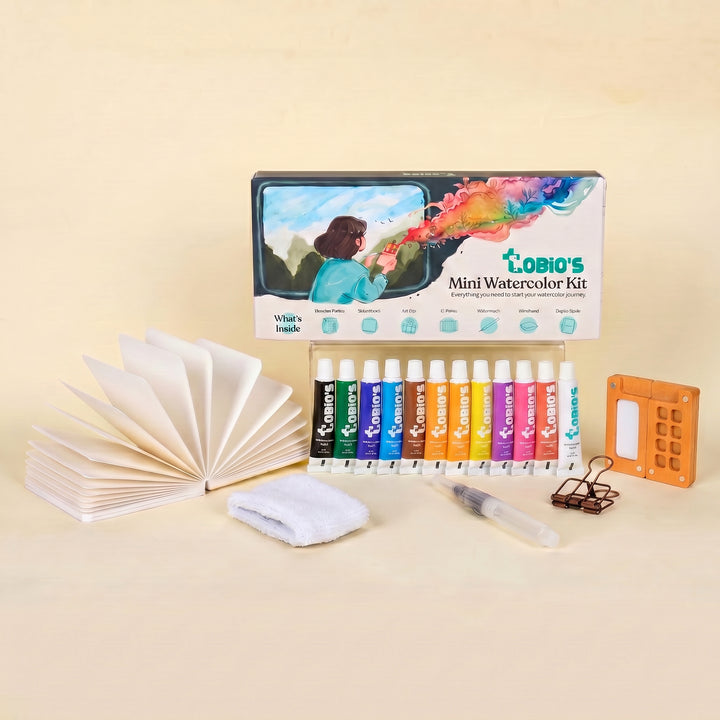
Ready to Paint?
This tutorial was designed for use with our Watercolor Kit.
Link to the link


