Thanks for painting with us!
- Short daily video lessons
- Friendly beginner community
- Cancel anytime
Palm Tree Watercolor Painting: Step-by-Step Tutorial


What You'll Need
- Watercolor Paper
- Pencil and eraser
- Two water cups
- Watercolors
- Round brush
Color Palette
Let’s be real, sometimes you just want a relaxing little painting session, not a three-hour battle with paper buckling and leaves that look like stiff green spaghetti. While this is a tutorial for a palm tree watercolor painting, we are throwing out the rigid rules. We’re focusing purely on a "Loose Sketchbook Style."
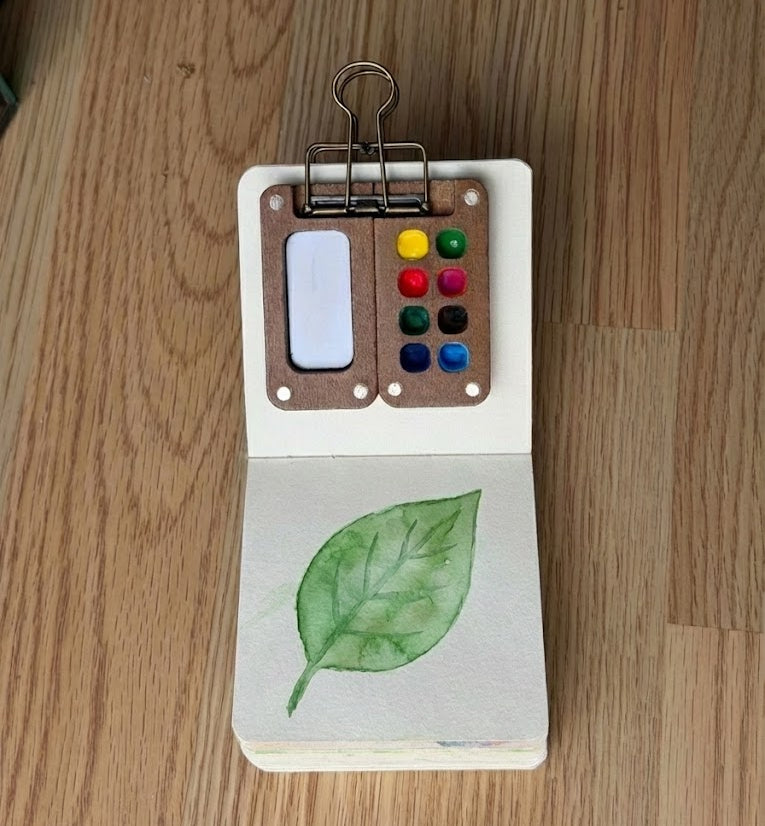
It’s fast, incredibly beginner-friendly, and all about capturing the vibe of the beach rather than stressing over botanical perfection. Take a look at the reference image: no perfectly taped borders, no complex tracing, and no fussy layers. Just a tiny sketchbook, a cute travel palette held by a binder clip, and pure creative freedom. Let's get perfectly imperfect.
If you want more projects like this after you finish, you can browse our full library of step-by-step lessons on Watercolor Tutorials.
The Color Palette
If you look closely at the painting itself (ignoring the bright, saturated pans in the wooden palette), the artist used a very earthy, muted, and relaxing color scheme. Here are the specific pigments we'll be using to recreate this exact look:
- Washed-out Sky Blue: A highly diluted, gentle blue for the background.
- Sandy Yellow Ochre: A warm, muted yellow-brown for the ground.
- Muted Sap Green: A relaxed, earthy green for the palm fronds.
- Warm Burnt Umber: A rich, natural brown for the trunk and shadows.
How a Palm Tree Is Built (and How to Paint It Loosely)
Before you pick up the brush, spend one minute on how a palm actually grows. It is the difference between a palm and a green starburst on a stick.
- One trunk, one crown. A palm has no branches. Every frond grows from a single point at the top of the trunk, the crown, and arches out and down from there. Get that point right and the tree reads as a palm even when everything else is loose.
- Each frond is a curve, not a straight line. A frond has a center rib that rises out of the crown, then bends and droops at the end. I paint the rib as one curved line first, then pull the leaflets off it toward the tip, the way they grow.
- Some fronds point at you. Fronds that reach toward you look short, and fronds that reach sideways look long. Mix both. If every frond is the same length, the crown looks flat, like a clock face.
- Let the trunk lean. Real palms bend toward the light or the sea, and the trunk is a little wider at the bottom. A ruler-straight trunk looks like a lamppost.
- Press, then lift. With a round brush, press down for the wide middle of a leaflet and lift off for the point. One medium round brush with a good tip does every frond in this painting.
- Paint from the shoulder. Pull each frond in one quick sweep of your whole arm. Slow, careful strokes from the fingers come out stiff and wobbly.
- Two greens, not one. Add a touch of Warm Burnt Umber to your Muted Sap Green for the fronds at the back, and keep the front fronds lighter and more watery. That small change gives the crown depth without any detail.

The Quick Sand & Sky Wash
Dip your brush in clean water and lightly wet the areas where your sky and sand will go. Drop in your Washed-out Sky Blue at the top and let it fade out naturally. While it's still damp, wash in your Sandy Yellow Ochre at the bottom. Leave plenty of white space, those unpainted gaps give the sketch its breezy, effortless charm. Let this dry.

The Relaxed Trunk
Load your brush with Warm Burnt Umber. Starting from the bottom, paint a slightly curved, single stroke upward, letting it taper off naturally at the top. Palms are relaxed; let your trunk lean a little.
If the color pools at the bottom, perfect!
That naturally creates a shadow near the sand.

Expressive, Droopy Fronds
Mix up your Muted Sap Green. Starting at the top of the trunk (the "crown"), paint 5 to 7 curved fronds radiating outward. Use the tip of your brush, press down slightly in the middle of the stroke, and lift off at the end. Vary the lengths and let them droop. Remember: be like the palm.

Adding Earthy Depth
Before the fronds dry completely, dab tiny amounts of Warm Burnt Umber into the green near the center crown. Let the colors bleed together to create a natural, darker shadow where the leaves overlap. Add a quick, horizontal swish of brown under the trunk to ground the tree in the sand, and you're done! Step back and admire your 15-minute masterpiece.
The "Walk Away"
Now comes the hardest part: resist the urge to fiddle. You'll want to smooth out a bloom or "fix" a messy puddle, but don't. The true charm of an expressive palm tree watercolor painting lies in those unpredictable watermarks and natural bleeds. Drop your brush, step back, and let it dry completely.
Style Variations: Moody Midnight Palm, Sunlit Oasis, and Storybook Silhouette
Want to change the vibe of your palm tree watercolor painting?
Try these quick sketchbook adaptations:
The "Moody Midnight Palm" (Dramatic & Heavy)
- Cool the palette: Swap your warm sky blue and earthy greens for deep, moody blues like Indigo or extra Payne’s Gray mixed into your green.
- Deepen the shadows: Paint the underside of the fronds much darker, leaving only a tiny sliver of pale rim light on the very top of the crown.
- Lost edges: Let the bottom of the trunk bleed entirely into a dark, heavy ground wash to anchor it in the night shadows or wet shoreline.
The "Sunlit Oasis" (The Smooth, Gentle Phase)
- Lighten the palette: Stick to highly watered-down Yellow Ochre for the sand and the palest wash of warm, spring green for the fronds.
- Change the proportions: Soften the jagged fronds so the palm sits as a wide, rounded, umbrella-like canopy.
- The "Fresh" Texture: Skip the heavy, dry-brushed brown shadows on the trunk. Keep the washes light and smooth for a fresh, breezy, sun-bleached look.
The "Storybook Silhouette" (Simplified for Cards & Patterns)
- Exaggerate shapes: Push the shape language into perfectly fanned, geometric fronds or distinct, stylized curves.
- Bring back the speckles: Lean into the illustrative vibe by flicking a few perfect, deliberate splatters of paint over the dry sky for a stylized, starry-night texture.
- Flat color: Skip the messy watermarks. Use flat, highly-pigmented, graphic washes of solid color (like a solid black palm tree against a bright pink sunset).
Inspiration: Why This Style Works
This loose, expressive sketchbook approach to a palm tree watercolor painting is perfect for:
- Travel Journals and Beach Vacations:
Capture the breezy, tropical vibes you spotted on a coastal getaway without needing a telephoto lens or a botany degree. You don’t need to paint every single coconut or leaf vein; you just need that iconic, leaning silhouette to bring the memory back. - Breezy & Coastal Decor:
Because palms are naturally relaxing and organic, a soft, loose study looks timeless in a bathroom, sunroom, or cozy reading nook. Frame a trio of these (perhaps experimenting with different sky colors at sunrise, noon, and sunset) for instant, nature-inspired wall art that doesn't feel "store-bought."
Frequently Asked Questions
How do you paint a simple palm tree?
Paint the trunk as one slightly curved stroke of Burnt Umber, from the ground up. From the top, pull 5 to 7 curved green fronds outward: touch down with the tip, press in the middle, lift at the end. Let them droop. A dab of brown where the fronds meet gives the crown its shadow.
What colors do I need to paint a palm tree?
Four: a pale sky blue, Yellow Ochre for the sand, Sap Green for the fronds and Burnt Umber for the trunk and shadows. Keep them muted and watery. An earthy green and a soft brown look more like a real palm than bright tube colors.
How do you paint a tree in watercolor as a beginner?
Start with the trunk, then the leaves, and finish with the shadows. Keep the first layer pale and add darker color while it is still damp, so the two blend. A palm is a good first tree because it has one trunk and a handful of fronds, with no small branches to get lost in.
What is the golden rule of watercolor?
Work from light to dark. A light color cannot cover a dark one. In this painting the pale sky and sand go down first, then the trunk and fronds, and the dark brown accents come last.
Why does my palm tree look messy instead of realistic?
You didn't do anything wrong! This loose palm tree watercolor painting style is all about capturing a breezy beach vibe, not botanical accuracy. Embrace the wild fronds and leaning trunks, real palms get battered by the wind anyway.
My green fronds and brown trunk turned into a muddy puddle. How do I fix this?
Ah, the classic watercolor bleed! To keep your colors distinct, you must let the brown trunk dry completely before painting the green crown. Impatient?
A hairdryer on low for 30 seconds works wonders.
I skipped the masking tape and my paper is buckling. Is that okay?
Totally fine! A little warping adds to that handmade, organic sketchbook charm. If the buckling really bothers you, just let the painting dry completely, close your sketchbook, and leave a heavy book on top of it overnight.
Conclusion
A solid palm tree watercolor painting comes down to three things: a soft sky wash, a simple trunk, and fronds painted with relaxed, varied strokes. Keep your first layer light, let things dry when needed, then add just enough darker color to create depth.
Want your next project lined up and ready to go? Check out more guided projects in Tobio’s watercolor tutorials, or head to Tobio’s Kits to keep your creative momentum going.
Mel, FounderLike these guides? Set Tobio's as a preferred source on Google and our pages will show up first when you search for watercolor questions.

Loved this one? Keep painting with the Academy
Tobio's Painting Academy turns one tutorial into a daily habit: a 30-day challenge with video lessons, guided exercises and feedback from our team. Get 30 days free with the Mini Watercolor Kit.
- 20+ step-by-step video lessons
- Live coaching and feedback
- Mini Kit + free workbook and pouch
- 30 days free, then $12.99/month

4.8/5 from 7,000+ reviews