


Salt Watercolor Painting: Step-by-Step Tutorial


What You'll Need
- Paper
- Brushes
- Paint colors
- Palette
- Water cup
- Pencil
Color Palette
When most people search for a salt watercolor painting, they are looking for that classic trick where you sprinkle table salt over wet paint to create galaxy textures. But today? We are taking it literally.
We are doing a loose sketchbook study of an actual pile of salt. This is a fast, beginner-friendly exercise in painting white objects and mastering negative space. Forget the masking tape, the hair dryers, and the complex layering. We are going to capture the icy, crystalline geometry of coarse salt in under 15 minutes.
The Supplies (Keep it Simple)
You do not need a massive studio setup for this. You just need tools that let the water do its job.
- Paper: 140lb/300gsm Cold Press paper. The natural bumps in the cold press paper will actually help mimic the rough texture of the salt crystals!
- Brush: A single Size 6 or 8 Round Brush.
- Paints: See our specific minimalist palette below.
- Extras: A water cup, a paper towel, and a pencil.
The Color Palette
How do you paint a white object on white paper? You paint the shadows. Based on the sketchbook study above, we are using a cool, frosty palette of just three pigments:
- Payne's Gray: The absolute MVP for painting moody, realistic shadows on white objects.
- Cerulean Blue: A tiny touch of this gives the salt a translucent, icy gleam instead of looking like dull gray rocks.
- Burnt Umber: Mixed very lightly with Payne's Gray to create a warmer, grounding shadow at the very base of the pile.
Step-by-Step: Your Expressive Salt Watercolor Painting
The secret to painting convincing crystals is hard edges and preserving your white space. The untouched paper is your brightest highlight! Once you cover those pristine white gaps with paint, you lose that icy, translucent sparkle forever. Resist the urge to blend everything into a soft, smooth gradient. For a realistic salt watercolor painting, sharp contrast and confident, unblended shadows are your best friends.

The Jagged Sketch
Grab your pencil and lightly sketch a triangular mound.
- Don't draw every single tiny grain of salt.
- Outline the general shape, and sketch a few larger, geometric squares and jagged shapes around the outer edges where the crystals catch the light.

The Icy Underpainting
Load your brush with a very watery, transparent mix of Cerulean Blue and a speck of Payne's Gray.
- Dab this light wash loosely into the center and lower half of the pile.
- Leave plenty of stark white paper completely untouched, especially at the top of the mound. These white gaps are what make the salt look shiny and crystalline.

Carving the Crystals
While your first light wash is still slightly damp (but not puddling), it’s time to carve out the shapes.
- Pick up a thicker, darker mix of Payne's Gray.
- Tap this dark pigment into the bottom edges and crevices of the "crystals" you sketched.
- Use the tip of your brush to make sharp, angular little triangles of shadow. Let some of the dark gray bleed slightly into the lighter blue wash for a natural transition.

The Grounding Shadow
If we stop now, our salt pile will look like it's floating in mid-air.
- Mix Payne's Gray with a tiny touch of Burnt Umber to neutralize it.
- Sweep a loose, horizontal shadow directly underneath the pile, pulling it out slightly to the right side.
- Use a clean, damp brush to soften the very outer edge of the shadow so it fades beautifully into the paper. Then, step back and let it dry.
The Expression (Defining the Face)
Wait for the face to be dry.
- Use a smaller brush with thick Burnt Umber.
- Darken the eyebrows and the shadow under the nose.
- Add the eyes. In this loose style, you don't need whites of the eyes. Just simple dark shapes often convey more peace than hyper-realistic eyes.
- Add a light wash of blue in the background if you want to frame the halo.
Troubleshooting: Fix Weak, Messy, or Muddy Results
Problem: “Nothing happened”
- Cause: wash was too dry or too pale
- Fix: salt earlier (satin stage) and use a richer wash
Problem: Giant cauliflower blooms and chaos
- Cause: puddles or too much salt dumped in one spot
- Fix: blot puddles before salting, sprinkle lightly, avoid blasting with a hair dryer
Problem: Paper buckled or tore when removing salt
- Cause: thin paper or rubbing too aggressively
- Fix: use 300 gsm paper, tape edges, brush off gently only when fully dry
Problem: Muddy color
- Cause: overmixing too many pigments, reworking the salted area while damp
- Fix: limit to 2 to 3 pigments per wash and let it dry completely before glazing
Frequently Asked Questions
How do you paint a white salt watercolor painting?
The trick is that you aren't painting the white salt; you are painting the shadows on and around the salt. The bright white of your watercolor paper acts as the actual salt crystals. By painting a cool gray (like Payne's Gray) in the crevices and adding a darker shadow underneath the pile, the unpainted paper suddenly looks like a 3D mound of salt.
Why did you use blue to paint salt?
Pure black or flat gray can look dead and heavy. Adding a tiny touch of Cerulean Blue to your shadow mix gives the salt crystals an icy, translucent quality. It makes the pile look reflective and "crisp" rather than looking like a pile of dull gravel.
My salt pile looks like a soft gray blob. What went wrong?
You probably used too much water and blended your shadows too much. Salt crystals have hard, angular facets. You need to use less water on your brush and leave crisp, hard edges to your shadow shapes. If you over-blend, you lose the crystalline texture.
Do I need to draw every single grain of salt?
No! If you try to sketch every tiny grain, you'll go crazy, and the final painting will look overworked. Sketch the overall shape of the mound, and then just suggest a few larger, distinct square or jagged shapes near the edges. The brain will fill in the rest of the details.
Conclusion
Salt watercolor painting is all about controlled timing: paint a juicy wash, wait for the satin stage, sprinkle lightly, and let it dry completely before brushing off. Once you nail that rhythm, you can use salt textures for galaxies, snow, beach foam, and abstract layers that look way more complicated than they are.
Want more step-by-step techniques you can actually finish into real projects? Head to Tobio’s watercolor tutorials, then swing by Tobio’s Kits when you’re ready to stock up and keep painting.
Mel, Founder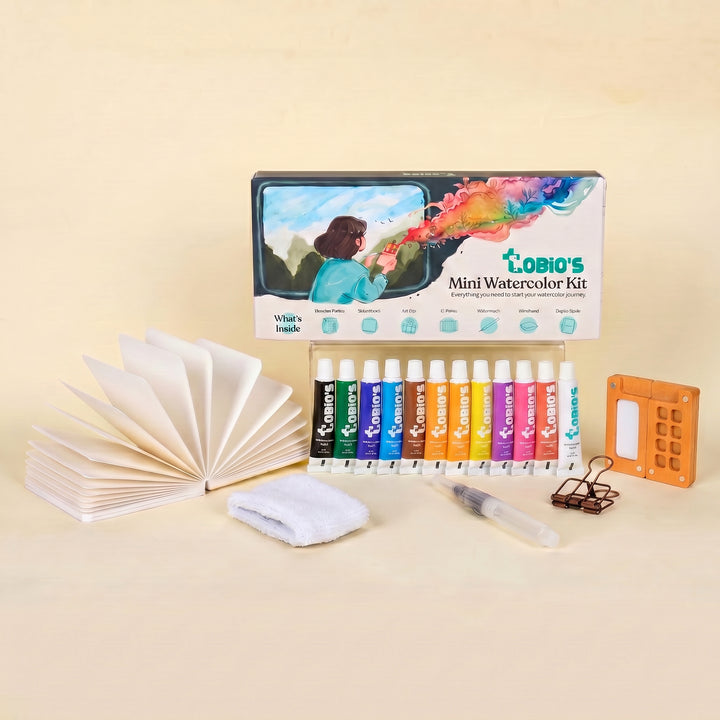
Ready to Paint?
This tutorial was designed for use with our Watercolor Kit.
Shop the Kit


